Owner and Committee Portals with Strata Communicator
Strata Communicator delivers the ability to offer branded Owner and Committee Portals via the internet to your client base. Owner and Committee Portals with Strata Communicator replace the previous mystrataplan website, simplifying the installation process and allowing you to differentiate your service at no additional cost.
The Owner and Committee Portals have been upgraded! To get up to date with what has changed check out the videos and resources available at Strata Master Owner and Committee Member Portal Upgrade (2019)
- Overview
- Installation
- Strata Communicator Configuration
- Portal Activation
- Design and Branding
- Customisation of Owner and Committee Portals Content
- Minimum Product Versions
Overview
Owners and Committees can have the ability to:
- View contact details for their properties (Additional contact details are optional)
- View agent and tenant contact details (Additional contact details are optional)
- View the distribution method for levies, meetings and correspondence
- Contact the agency to update their details
- View levy paid to dates
- View general financial details for their properties
- Retrieve their username and password
- View Held and Scheduled Meetings (optional)
- View Documents (optional)
- View Document Descriptions (optional)
- View Committee Contact Details (Committee only)
- Show building images
- Show manager image and contact details
- View Repairs and Maintenance – Subject Only, or opt to display Details and/or Images
Installation
Before using this guide to configure your Owner and Committee Portals, you must complete the installation of Strata Communicator using the Installation Guide.
Strata Communicator Configuration
The Strata Communicator Configuration screen allows you to configure and customise access to your Owner and Committee Portals. The Strata Communicator Configuration screen can be accessed from any workstation with Strata Master by a user with appropriate access levels by selecting the Configure > Communicator Configuration menu option.
Each time the configuration screen is loaded, Strata Master will check for updates via the internet. If a newer version is detected you will be prompted, and the installation will launch automatically.
When you’ve successfully installed the required components and your database is active, follow the menu on the left-hand side of the Strata Communicator Configuration tool to activate your services.
Portal Activation
If you wish to use the Strata Owner and Committee Portals, this service must be activated. Select the Active checkbox against your database and wait for the confirmation message that the change was saved.
Owner and Committee Portal URL
The Portal URL section displays the internet address that needs to be used to access the Owner and Committee Portals.
To integrate the portals onto your own web page, copy the address and paste it as a link into your website. Alternatively, you can issue these addresses directly to your Owners and Committees to give them access to your branded portals. You will also require your Portal URL address when notifying your Owners and Committees that they can view their property details online.
Documents on Portals Activation
If you use File Smart and wish to share documents and invoices with Owners and/or Committee Members, this service must be activated.
See the article to Setup Documents on the Portals for Strata Master
Additional Communicator Services
Meeting Master Activation
To allow synchronisation of your meetings with Strata Master using the MEETING Master app, visit Strata Master and Meeting Master Integration
Strata Mobile Activation
To allow your Strata Master users to access contacts via the Strata Mobile app (available for Android and Apple phones), visit Strata Master and Strata Mobile Integration.
Online Invoice Approval
File Smart customers can streamline their external invoice approval process. For instructions on setup and use, please view this link: https://kb.rockend.com/help/invoice-approvals
Design and Branding
The branding section in the Strata Communicator Configuration screen allows you to customise your portal webpage with your agency’s branding to provide a seamless transition from your agency website to your Owner and Committee Portals. You can set custom header and footer banners linked to a website of your choice and set an accent colour for the buttons on your portals.
Login Screen
The Login Screen Text is displayed underneath the Header Banner on all the pages of your Owner and Committee Portals. This field can be used to display a welcome message, slogan or agency tagline.
Agency Branding
The Header and Banner are displayed on all pages of the portal, so it is important that you use high quality images that reflect your brand.
Header Banner
To set the Custom Header Banner for your portals, upload and save an image that meets the following specifications:
Height: 120 pixels
Width: 1440 pixels
File Format: JPEG or PNG
File Size: Recommend size is 100KB, not exceeding 900KB
Enter a Hyperlink that can be accessed when the Header Banner is clicked. If no link is added, the banner will display as a static image on your portals.
Footer Banner
To set the Custom Footer Banner for your portals, upload and save an image that meets the following specifications:
Height: 75 pixels
Width: 1440 pixels
File Format: JPEG or PNG
File Size: Recommend size is 100KB, not exceeding 900KB
Enter a Hyperlink that can be accessed when the Footer Banner is clicked. For example, the footer banner could be an advertisement of additional services you offer, with a hyperlink to your agency’s services on your website.
Click Save Changes and wait for the confirmation message that the changes were saved.
Accent Colours
The accent colours section allows you to set a custom theme for all buttons displayed on your portals.
Accent Colour for Buttons
The default accent colour for buttons is gray. To set a different colour, select a colour for your website buttons from the drop-down list.
Text Colour for Buttons
The default text colour for buttons is white and can be changed to black.
Button Preview
The button preview displays an example of how your buttons will looked based on the button colour and text colour you selected.
Click Save Changes and wait for the confirmation message that the changes were saved.
Mobile Icon
Upload a new mobile icon to reflect your brand when the portals are saved to a mobile user’s home screen. A default icon is provided, and instructions for lot owners to add this to their phones home screen are included in a brochure template which is available for you to customise.
Website Background
You can set a page background image or colour that will persist throughout the site. Strata Communicator is shipped with 4 background templates, or you can upload your own high-quality background image to reflect your brand.
Setting the background colour
The default background colour is off-white. To set a different background colour, select a colour from the drop-down list.
The selected colour will display in the preview window to provide an example of how the colour will look on a web page.
Click Save Changes and wait for the confirmation message that the changes were saved.
Setting the background image
When you select the Background Image checkbox, you can set an image instead of a colour to display as your background image.
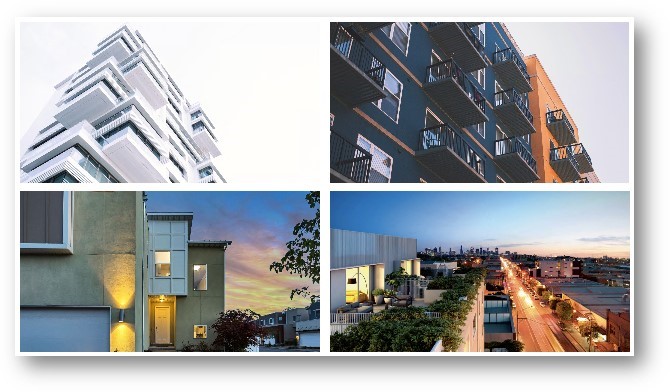
Select a background from Rockend's library
When you select this option, click the Select an Image button to preview the library selection. Select one of the images in the library (shown below) and click the Next button to see a larger version of the image you selected.
If you are happy with your selection, Click the Change Image button to select a different image from the library, or if you are happy with your selection click the Save Changes button and wait for the confirmation message that the changes were saved.
Select your own background image
When you select this option, you will have the option to browse for and upload your own background image that meets the following specifications:
Height: 859 pixels
Width: 1600 pixels
File Format: JPEG or PNG
File Size: Recommend size is 100KB, not exceeding 900KB
To upload your own background, click the Select an Image button to browse for a file on your computer. Click Open to select the image. A preview will display a larger version of the image you selected. If you are happy with your selection, Click the Change Image button to select a different image from the library, or if you are happy with your selection click the Save Changes button and wait for the confirmation message that the changes were saved.
Customisation of Owner and Committee Portals Content
The Customisation tab of the Strata Communicator Configuration tool allows you to configure some of the settings required for your portals.
Communication Customisation
The Communication Customisation section allows you to set an email address for contact received via the portals, and to stipulate whether a reply-to email address is required to be entered by the portal user when submitting a contact form.
Contact Form
Enter the email address that will be used to send all contact requests via your Owner or Committee portals. If no email address is recorded here, Portal Contact Forms will be forwarded to the email address saved in your agency configuration settings in Strata Master.
Reply to email address
Select the checkbox to prompt portal users to supply their email address for responses when they submit a contact request via the portal. When selected, the form cannot be submitted without providing an email address.
Click Save Changes and wait for the confirmation message that the changes were saved.
Portal Content Customisation
The Portal Customisation section allows you to set preferences for the content to be displayed to your Owners and Committee Members.
Home Page
The Home page will display by default to all users logging into the portals and provides and overview of important information. Use the checkboxes to specify whether to display the following additional content:
- Show Bank Balances
- Show Arrears and Interest Due
Reports Page
Use the checkboxes to specify whether the Reports tab should display for Owners and/or Committee Members.
Maintenance Page
Use the checkboxes to specify whether the Maintenance tab should display for Owners and/or Committee Members. Use the checkboxes provided to specify whether to display the following additional content:
- Maintenance Details
- Maintenance Images
Portfolio Page
The Portfolio page will display by default to all users logging into the portals. Use the checkboxes to specify whether to display the following additional content:
- Show Property
- Show Arrears and Interest Due
Owners Corporation Page
The Owners Corporation page will display by default to all users logging into the portals. Use the checkboxes to specify whether to display the following additional content:
- Show Manager Name and Photograph
- Show Manager Email Address
Meetings Customisation
The Meetings Customisation section allows you to set meeting and voting preferences on our Owner and Committee Portals.
Meetings Page
Use the checkboxes to specify whether the Meetings page should display for Owners and/or Committee Members.
Online Voting – Motion Responses
If you use Rockend’s free Electronic Pre-voting solution, you can specify the wording of the motion responses to display to voters on the portals.
The default selections are: Yes | No | Abstain.
To change the wording, overwrite the defaults and click Save Changes and wait for the confirmation message that the changes were saved.
Minimum Product Versions
Strata Master Version 11.5 or higher is required to access the portal options listed above.
File Smart Version 7.10 or later must be installed to use Documents on Portals and activate the Document description option.