How to do an Email Merge in Rest Professional
Overview
In Rest Professional, you can merge to an email from a template saved in the Rest Word folder in the same way you would a normal merge letter, or you can create a new document to email through Rest Professional. You can also attach documents to be sent out with your email merge through Rest Professional.
Steps
We recommend you do a test run before a bulk run to ensure the outcome is what you expected.
Go to Other > Print Letters / Mail Merge.
Select merge with Tenant or Owner as required.
NOTE: Unlike normal mail merge, you must send owner emails by merging with either Owner or Property. Choosing to merge with Property will give you more merge fields to choose from but will still email to owner rather than tenant.
Select the Type of Letter which best suits this merge. If you do not need Rest Professional to select the criteria for the type of letter just leave this as General.

Select the relevant Contact, Manager & Property Type as required
Filter – from the selection on the right ensure the email address is set to Valid
Selection - if you have selected a specific type of letter and completed the filter, leave the the selection as All, as Rest Professional will select the contacts that fall within this filter. Otherwise select either All, a Range or select tenant/owner,property.
NOTE: If you tick the Property Order box and then select it will show in property order.
Output - Select Email
When the Electronic Consent System Option is enabled the filter Electronic Service of Notices is available.
- The filter will default to All.
- When changing the filter to Yes, the results will only include tenants who have consented to electronic service of notices.
- When changing the filter to No or Not Recorded, the results will only include tenants who have not consented to electronic service of notices and
- When changing the Output type to Email, a prompt will display to automatically set the filter to Yes.
- The email will not be sent to the Tenant contact unless Yes is selected on the tenant's file. For more information click on Consent for the Electronic Services of Notices and Documents
Click on Browse, find your document you wish to email to & click Open
NOTE: If you would like this merge to show on your Tenant ledger tick the Update tenant history box. If you would like to save the email letter(s) to Document Management select which master file you wish it to be saved toClick on Preview-F11
Enter a subject for your email in the Subject field.
If you would like to add an attachment, click on Attach File (this is not a merge document, and will attach as a standard document, image or PDF).
Rest Professional will generate a list of Tenants or Owners to email (If you wish to deselect any, untick as required).
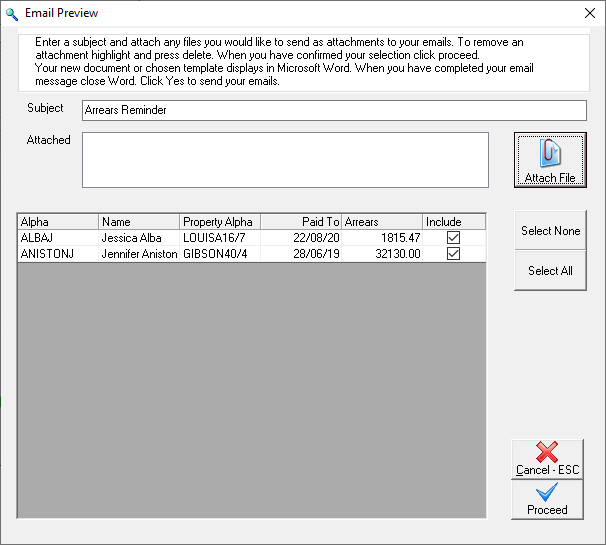
Click on Proceed & Word will generate your merge template.
Once the template has generated, you can click on Preview Results to see how the email will look and ensure the correct merge fields have been selected
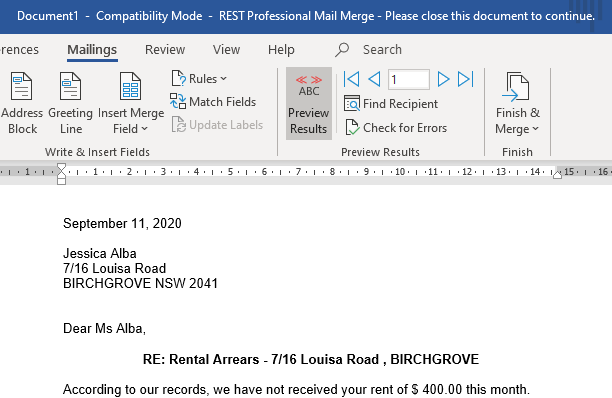
Close the document by clicking on the X icon up the top right hand corner of the Word document.This will prompt Rest Professional to send the email/s. A screen will now generate that asks if you want to send these email/sms message.Click Yes.


- You will then be prompted to save this to document management. Click Yes if required
Note: For more information, click the links below to view other articles about Mail Merge:
- How to Create and Edit a Mail Merge Template in REST Professional
- How to do a Mail Merge in REST Professional
- List of Merge Fields in REST Professional
- Create a Date in Mail Merge Documents