fileSMART Outlook Add-in - Installation and User Guide
This document covers the use of the fileSMART Outlook Add-in, introduced as a new feature in fileSMART version 4.0 The plugin provides seamless integration between Microsoft® Outlook® and fileSMART Archive allowing you to archive emails directly from Outlook. This removes the extra step of printing it to the Archive Printer and then filing it in fileSMART. The emails are stored as an Outlook message (.MSG) which retains any formatting and embedded attachments enabling you to save your emails in their original form.
Installation
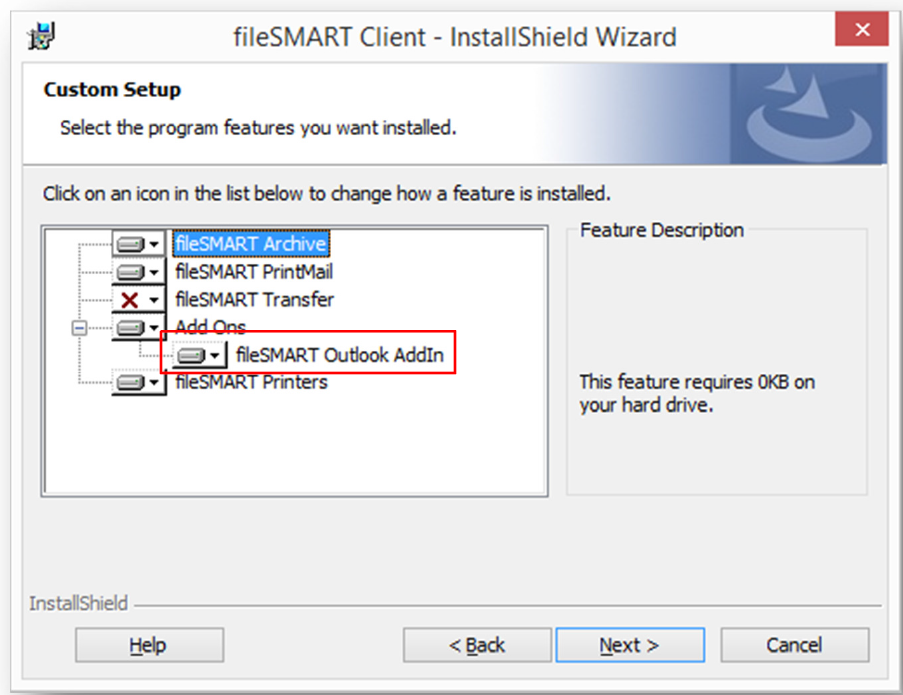
- To install the outlook plug in on your workstation, you need to select that feature in the install process when installing fileSMART on the workstation. If you already have fileSMART installed but did not install the Outlook Add-in at the time, you will need to re-run the install process and select the Outlook Add-in to install.
- To rerun the install, on your workstation select C: (or whatever drive FS is installed on) and the folder AS_Files. Eg. C:\AS_FILES\Packages\Client
- Run the fileSMART Client install application. Choose to install the Outlook Add-in

- Complete the installation as per the installation instructions.
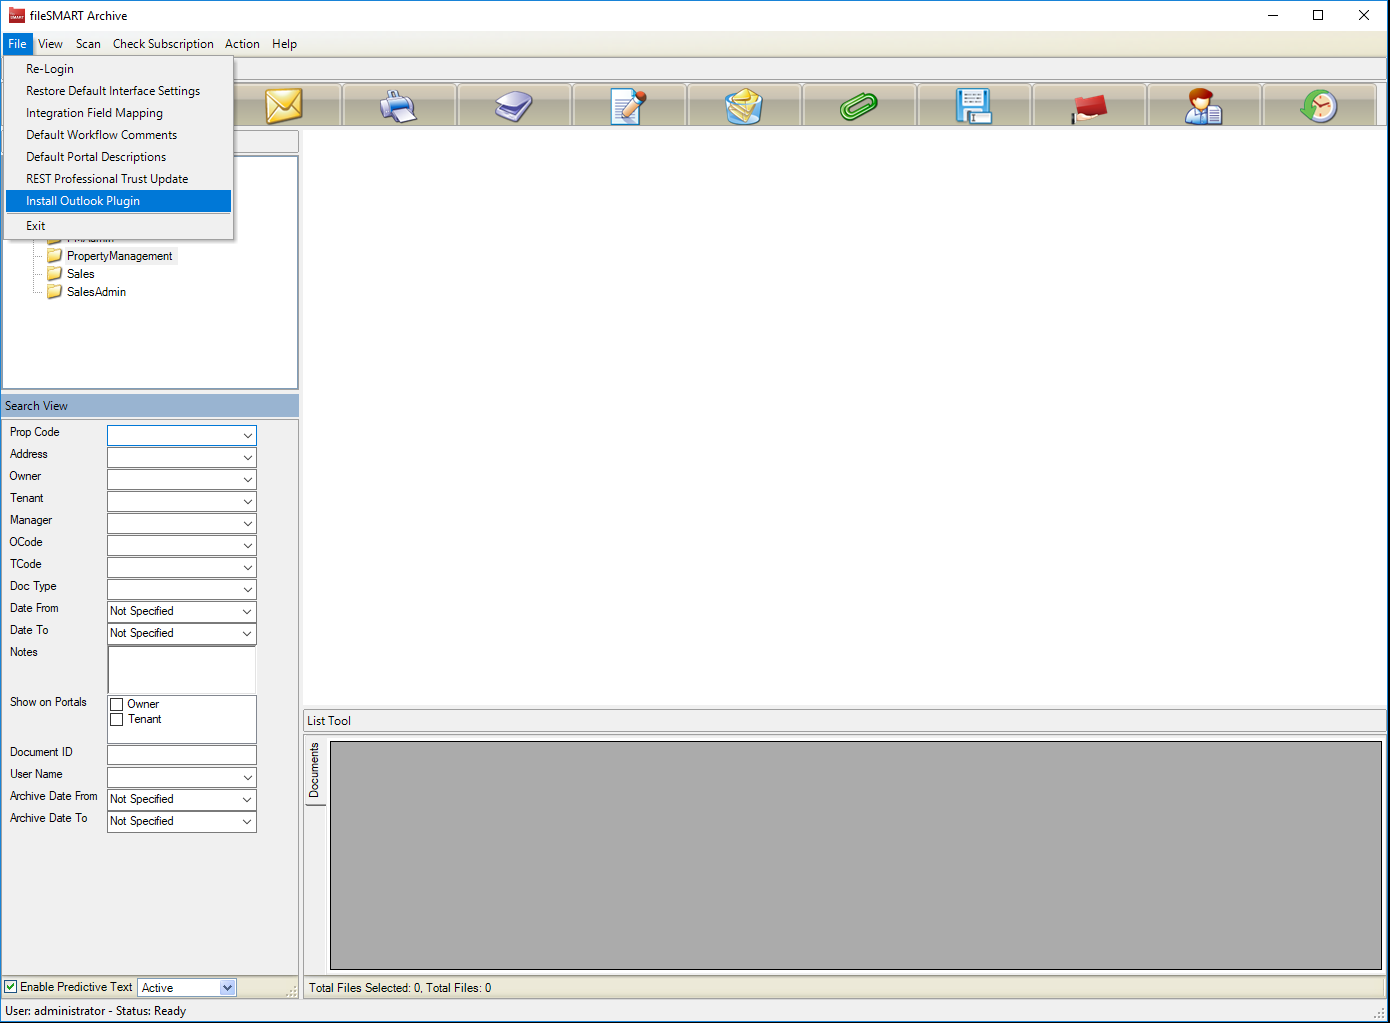
The plugin is one of the options when installing fileSMART on a workstation. If it hasn’t been installed it is possible to install it from the File menu in fileSMART Archive. After ensuring that both REST Professional and Outlook are closed, select the option to 'Install Outlook Plugin'.

Archiving an Email
- Select an email from your Inbox and click the 'Archive to fileSMART' button, which you will find in the ‘fileSMART Software’ tab in Outlook.

You can select several emails by holding the CTRL or SHIFT keys as you click them to archive several emails at the same time with the same archiving information.
- The first time you use the Outlook Plugin, it will prompt you to enter your login details.
- You will see the familiar fileSMART archiving screen appear with the labels relevant to the folder you selected as the default in the previous selection.

 The same rules apply as they do in fileSMART Archive when filling the labels. Any fields that are required such as Doc Type and Date will need to be filled before pressing the Archive button.
- Enter the field labels and click Archive.
- A copy of the email is now archived in fileSMART Archive and can be retrieved at any time by any user.
 If the email contains a PDF attachment of an invoice or other document that is to be collated and sent out via fileSMART PrintMail, then you will need to open the attachment and print it to the fileSMART Archive printer as described in the ‘Printing with the ‘fileSMART Archive Printer’ section and archive it manually.
Retrieving an archived email
- You can search for archived emails in fileSMART Archive as you would any other document. The email is displayed in HTML format without any embedded graphics using the built-in viewer.

- Clicking on the attachment link (as shown in the picture above) will open the attachment using the default program to open it.
- You can also open the email in its native format (provided you have Microsoft Outlook installed) by clicking the Email Documents
 button which will open the email in an Outlook message window (complete with any attachments). The message can then be forwarded on to email recipients and a copy will be saved to your Outlook sent items folder.
 To print the email, you will need to open it as an Outlook message as mentioned above and use the File -> Print option. At this stage you cannot print the email from within fileSMART Archive using the Print Documents button.

 button which will open the email in an Outlook message window (complete with any attachments). The message can then be forwarded on to email recipients and a copy will be saved to your Outlook sent items folder.