How to Install REST Messenger - YesBookIt and MyDesktop
This guide is designed to be carried out by a customer’s IT Provider
Overview
REST Messenger is used to facilitate the connection between a REST Database and 3rd party providers such as YesBookIt and MyDesktop
REST Messenger Pre-requisites
- REST Messenger license module - If you have not used this before, you will need to contact Rockend to add the REST Messenger license module
- The REST Messenger Server must meet the REST Professional System Requirements
- REST Professional must be on the latest version
- An installation of REST Professional and the database must be located on the same server where REST Messenger is being installed.
- Click here to download the latest version of REST Messenger
- Microsoft IIS enabled in Windows features
- Internet service with a static IP address
- Port forward TCP/IP Port 82 to the server from the internet
- Windows Server Operating systems are required for connection to My Desktop

Steps
REST Messenger installation
- The REST Messenger version MUST match REST Professional, ensure that REST messenger is upgraded during any future REST Professional Upgrades.
- Working on the REST Professional Database server, run the REST Messenger installation and follow the default prompts.
- The Database Connection Wizard should appear, complete the wizard using the options below
- Browse to the IIS Scripts folder: C:\inetpub\wwwroot\scripts (Ensure Microsoft IIS has been enabled).
- Browse to the REST Professional Database.
- Ensure the Regional & Language / Locale is set to Australia, and the date format to DD/MM/YYYY
Microsoft IIS Configuration
If required, refer to point 3 of the installation supplement for an illustrated guide.
- On your modem / router port forward TCP/IP port 82 from the internet to the REST Messenger server.
- Ensure that the IIS Web Server role has been installed on the Server, as well as the Windows IIS Admin service.
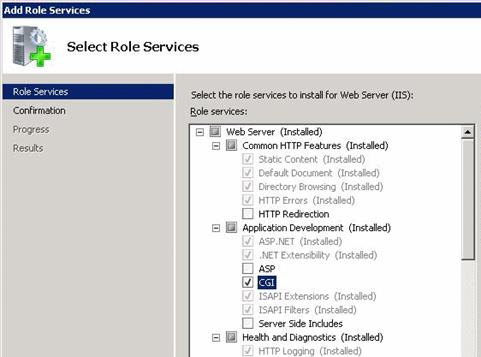
- Within Server Manager under IIS Web Server, enable CGI.
- Open C:\inetpub\wwwroot\scripts in Explorer and create a new blank text file, rename to RESTdata.dtd
- Within IIS Manager, create a new Web Site with the following specifics.
- Site Name: REST Messenger
- Physical Path: Browse to c:\inetpub\wwwroot\scripts
- Port: 82
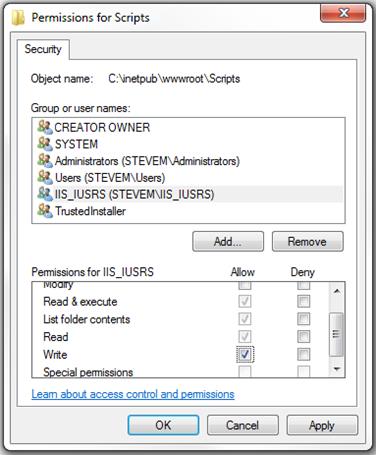
- Edit the security on the REST Messenger Scripts folder (c:\inetpub\wwwroot\scripts) and add the IUSR account with MODIFY permissions. (The default user for IIS anonymous is IUSR – Under Website > Authentication > Anonymous access).
If this is a Terminal Server and users will be running REST Professional, these users will also need READ access to the scripts folder.
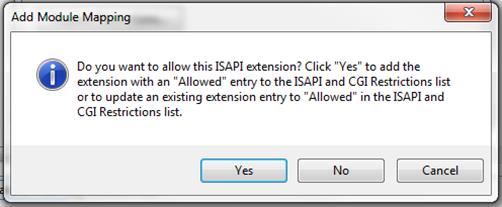
- Open the Handler Mappings for the new web site and add a new Module Mapping. (When complete, select yes if you are prompted to allow an ISAPI extension).
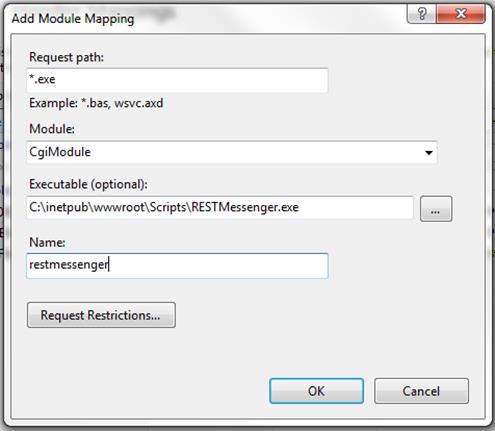
- Request Path: *.exe
- Module: Select CGI Module
- Executable: c:\inetpub\wwwroot\scripts\RESTMessenger.exe
- Name: RESTMessenger
REST Professional Configuration
- Edit the security on the REST Professional Database Share and add the IUSR account with MODIFY permissions.
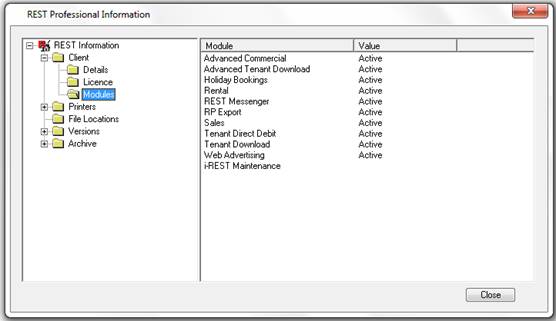
- Working inside REST, confirm the REST Professional Database has the REST Messenger license module installed. Other > About REST > REST Info > Client > Modules (Refer to the installation supplement).
- Activate Unique Alpha Codes. Other > Utilities > System Options > Miscellaneous. Move the Response Code dialog to the side and confirm that Enforce unique alphas has been ticked. (Refer to the installation supplement).
- Create a new REST user. The password will be used by MyDesktop / Yes Book It, the other fields are cosmetic except for the REST Messenger acct tick box.
Files > User / Password
The details are not case sensitive
- First Name: Rest
- Last Name: Messenger
- Initials: IR
- Security Level: Statistics / Company Details / Passwords & above
- Password: type in a small 5 character - alpha / numeric password
- REST Messenger acct: Must be ticked – This option is only present when the REST Messenger module has been installed
Final Testing
Test the connection by creating and entering a URL from the samples below:
Basic Internal Test: http://127.0.0.1:82/RESTMessenger.exe
Should result with “No parameters received”
Full Internal Test: http://127.0.0.1:82/RESTMessenger.exe ?type=owners&username=1&password=IREST
Full External Test: http://EnterExternalIP:82/RESTMessenger.exe ?type=owners&username=1&password=IREST
Password in this example is IREST
Should result with a list of owners
Completion
Pass the following details to the client so they can document and configure YesBookIt or MyDesktop
(all of this information can be collected from within the URL string).
IP: (IE: External IP Address)
Port: 82
Username: 1
Password: (IE: REST user Password)
Location: /restmessenger.exe
Test URL: (IE: as used in the Full External Test)
Troubleshooting
- Ensure Inbound TCP/IP port 82 has been forwarded from the internet to the REST Messenger Server, if the Windows Firewall is enabled ensure adequate inbound rules are added.
- The IUSR user can be confused with other user accounts such as the IUSRS Group. The IUSR is a specific build in user, ensure this user has modify permissions on the c:\Inetpub\wwwroot\scripts\ folder as well as all REST Database Folders
Installation Supplement
REST Professional License Modules
Check that your REST Professional license includes REST Messenger. Start REST Professional, from the menu select
Help > About REST > REST Info > Client > Modules
Enforce Unique Alpha’s
- Confirm Unique Alphas are enabled. In most case they already will be but you must check.
- In REST Professional select Other>Utilities>System Options and open the Miscellaneous Tab. You will get a prompt for a response code. Move this prompt aside if it obstructs any information behind it. If 'Enforce unique alphas' is 'greyed' and the check box to the left of it is ticked, then Unique Alphas are already enforced. You can close the System Options screen and proceed with the next section.
- If Enforce unique alphas is not checked, then contact Rockend for a Response Code. Once you get the response code you can tick Enforce unique alphas and select OK.
- Select OK again on the proceeding dialog, REST will then check for duplicates.
- If duplicates are found REST will allow you to save them in a text file, a REST user with sufficient privileges will need to look up each Alpha in REST and make the appropriate changes. Refer to http://kb.rockend.com/help/activating-unique-alphas
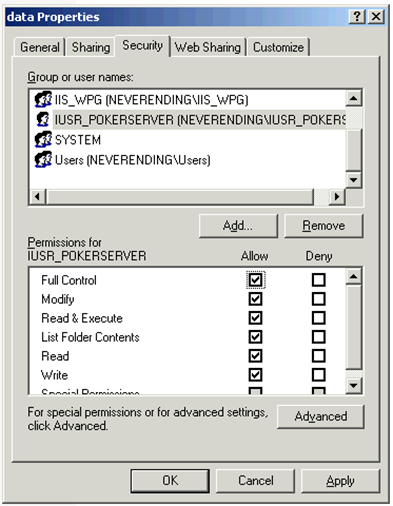
Add permissions to the REST Professional Database Share
Open Windows Explorer and browse to the REST Professional Database share. Right click the folder, select properties and then select the security tab. Add the IUSR account and tick "MODIFY", click Ok.
Manually Configuring REST Messenger
Overview
The database connection wizard will create the ConfigDataSources folder and connect to one database. If you need to add an extra REST Professional Database or a REST Professional Database is moved to a different computer on your LAN then read these instructions carefully.
REST Professional database locations
- REST Messenger requires a ConfigDataSources folder in the \inetpub\wwwroot\scripts folder.
- A ConfigDataSources folder is created in the REST Professional folder (eg. C:\REST) on each computer where REST Professional is installed.
- Inside the ConfigDataSources folder, a folder called "1" contains a workstation.ini file. (eg.C:\inetpub\wwwroot\scripts\ConfigDataSources) If there is more than one REST Professional database, they will also have folders named “2”, “3”, etc with workstation.ini files too.
- The workstation.ini file contains the data paths to the REST Professional database locations. REST Messenger will read this file to determine were the data is located on the network.
How to manually add a database location to REST Messenger
- Copy the C:\REST\ConfigDataSources\1\workstation.ini file from an existing workstation that is currently using REST Professional.
- Paste it into the C:\Inetpub\wwwroot\Scripts\ConfigDataSources\1 folder on the computer where IIS is installed.
- Edit the workstation.ini file using notepad and modify the data paths if required. UNC is the preferred method if the REST Professional Database is located on another computer. (Note: Do not use TCP/IP numbers or paths that contain a full stop, the indexing program will not read the data files correctly if a full stop is present in the path name).
- Also ensure that there is a reference to a documents folder in the [Data folders] section of the workstation.ini file. If the line is missing it should be added manually immediately below the ‘UpgradeFolder=’ line. See example below.
Example content of the workstation.ini file
CurrentFolder=\\server_name\share_name\REST \data\
HistoricalFolder=\\server_name\share_name\REST \History\
ImagesFolder=\\server_name\share_name\REST \Images\
WordFolder=\\server_name\share_name\REST \Word\
LogFolder=\\server_name\share_name\REST \Log\
UpgradeFolder=\\server_name\share_name\REST \Upgrade\
DocumentFolder=\\server_name\share_name\REST\Documents\
Multiple REST Professional databases
- If using multiple databases then you will have to copy the relevant workstation.ini files from the other ‘number’ folders in the workstations C:\REST\ConfigDataSources folder (2, 3, 4 etc).
- These should be copied into corresponding folders in the C:\Inetpub\wwwroot\Scripts\ConfigDataSources folder of the IIS server.
- Each of these workstation.ini files should be checked to ensure they are pointing to the correct data path. Note: Each of the workstation.ini files will have different data paths reflecting the different databases that REST Professional has access to.
- When connecting to different REST Professional databases via REST Messenger the username specifies which folder to use: eg. http://EnterExternaIP:82/RESTMessenger.exe ?type=owners&username=1&password=IREST contains "username=1" which means use the locations in the workstation.ini located in folder "1" in the ConfigDataSources path.
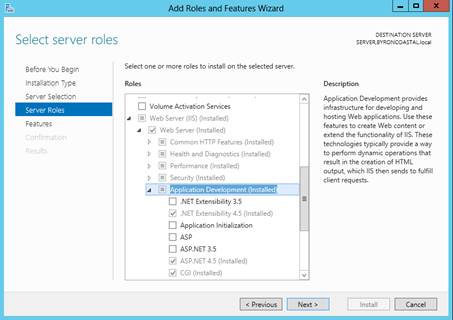
Microsoft IIS Illustrations IIS 7 - 7.5 - 8.0 Configuration
- For Windows Server 2012: Select "Server Manager" -> "IIS" -> "Roles and Features " -> “Tasks” -> “Add Roles and Features”. Go through the wizard to enable CGI.
- For Windows Server 2008: Select "Server Manager" -> "Roles" -> "Add Role Services" and enable CG
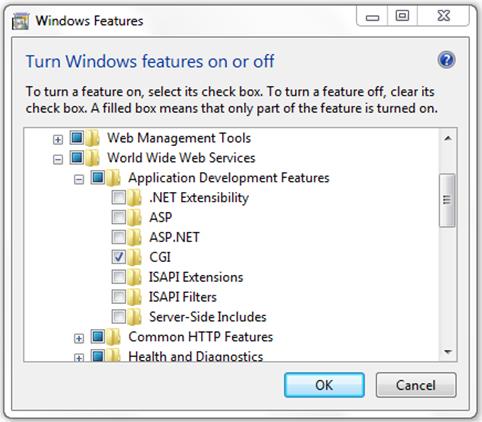
- For Windows Vista or 7: : Select "Control Panel" -> "Programs and Features" -> "Turn Windows features on or off" -> "Internet Information Services" -> "World Wide Web Services" -> "Application Development Features". Once you have CGI role enabled, you can start up the "Internet Information Services (IIS) Manager”.

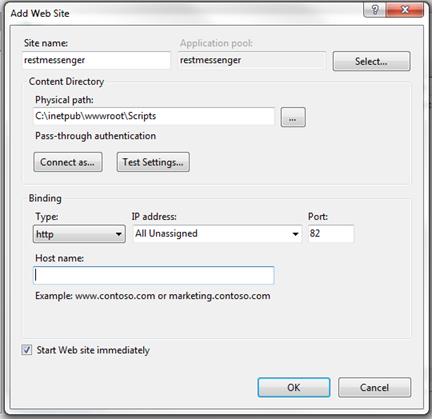
- Open “Internet Information Services (IIS) Manager”. Right-Click on “Sites”; select “Add Web Site”

- Enter "Site name" as RESTMessenger, under “Physical Path” click the browse button and select the location where the REST Messenger program was installed (C:\inetpub\wwwroot\scripts) and then change the "Port" from 80 to 82 and click Ok. (Note: If port 82 is already being used then specify a different port.)
- Click on the "RESTMessenger" site that you have just created and then select "Handler Mappings"
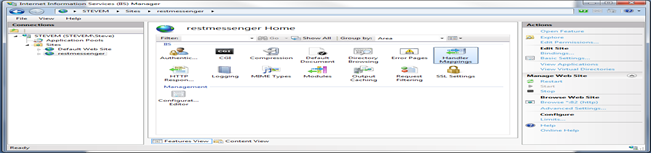

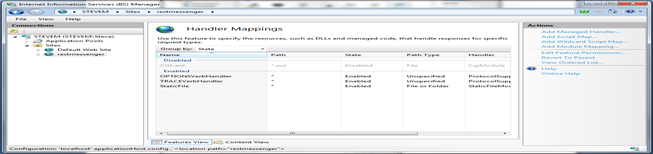
- Select "Add Module Mapping" from the menu on the right. For "Request path" enter *.exe, for "Module" select "CgiModule" from the list and then browse to RestMessenger.exe file (you will need to change the file dialog to find *.exe), for "Name" enter RESTMessenger and then click OK.
- The following dialog will appear, click "Yes"
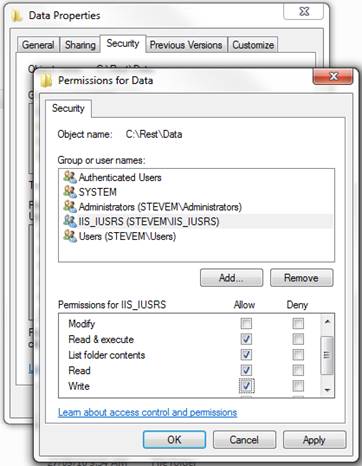
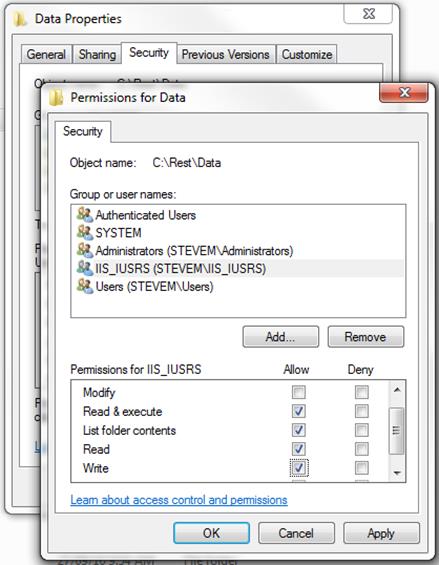
- Right click "RESTMessenger" site and select "Edit permissions", “Security”, select the local IUSR account and tick "Write" then click Ok. Open
- Open Windows Explorer and browse to the REST data folder. Right click the folder, select properties and then select the security tab. Add the IUSR account and tick "Write", then click OK
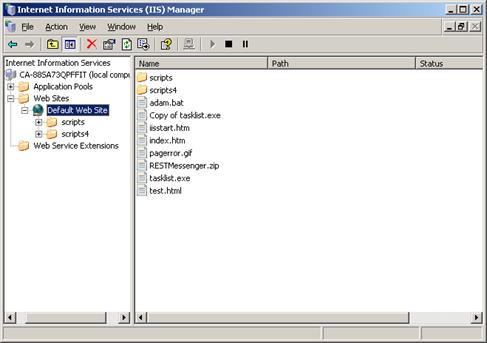
IIS 6 Configuration Open “Internet Information Services (IIS) Manager”
Right-Click on “Web Sites”; select “New” and choose “Web Site…” A Popup window will appear; click Next.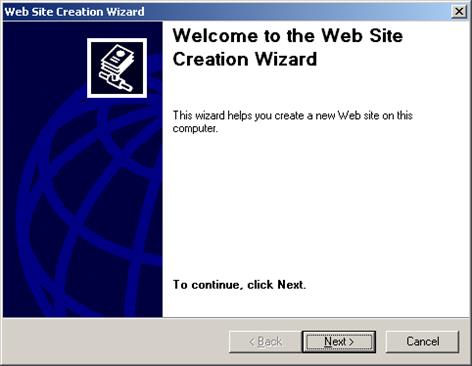
Specify “RESTMessenger” as a Description; then click Next.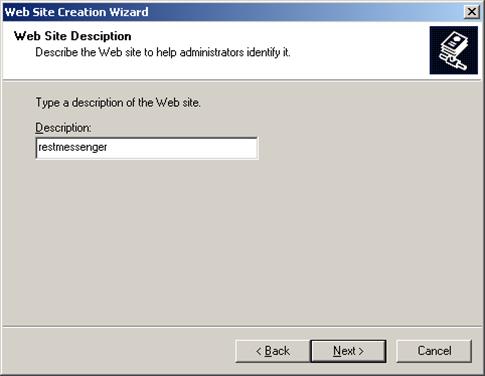
Specify Port82; then click Next (Note: If port 82 is already being used then specify a different port.)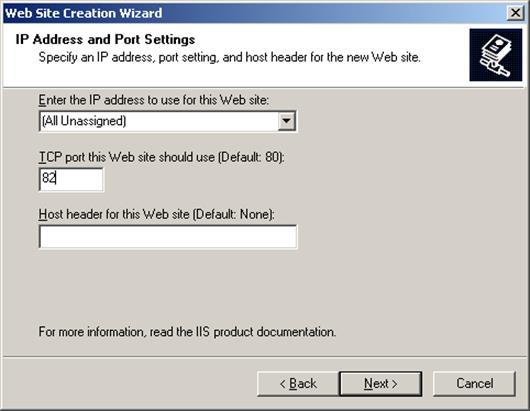
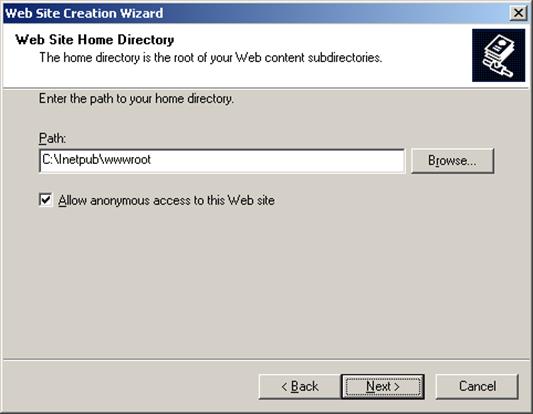
Specify the location of the web directory (c:\inetpub\wwwroot\scripts); ensure “Anonymous Access” is ticked; then click Next

Ensure “Execute” is ticked; then click Next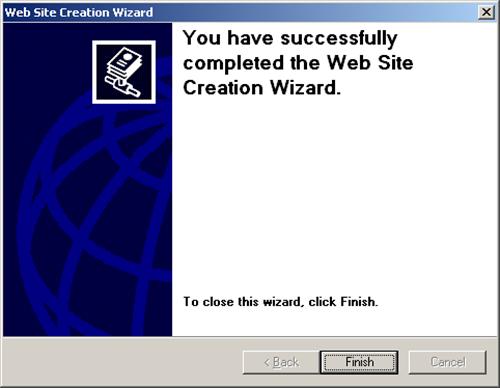
You are now finished adding the website


You now need to add a mapping to the REST Messenger program. Right click "RESTMessenger" website, select "Properties" then click the "Home Directory" tab.
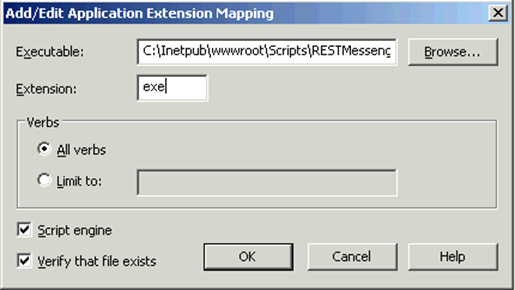
Click the "Configuration" button then click "Add". Click "Browse" and find the RESTMessenger.exe file (c:\inetput\wwwroot\scripts\RESTMessenger.exe) then enter "exe" for "Extension" and click "Ok".
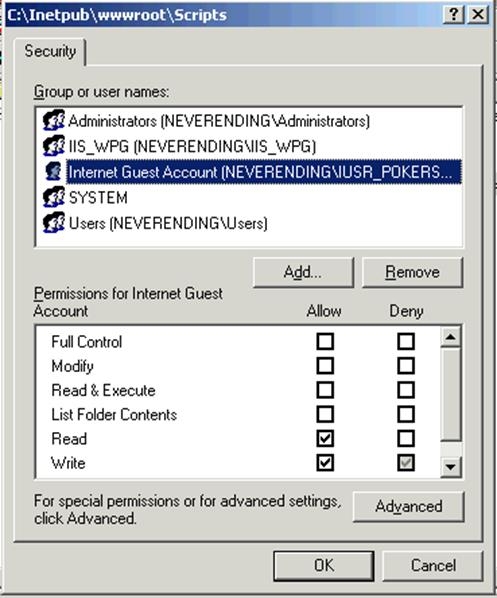
Right click "RESTMessenger" website, select "Permissions", select the local "Internet Guest Account" account and tick "Write" then click Ok.
Right click "Web Service Extensions" and select "Add a new Web service extension". For "Extension name" enter "RESTMessenger", click add and then browse to the location of RestMessenger.exe (c:\inetpub\wwwroot\scripts\RESTMessenger.exe ), make sure that "Set extension status to Allowed" is ticked and click "OK".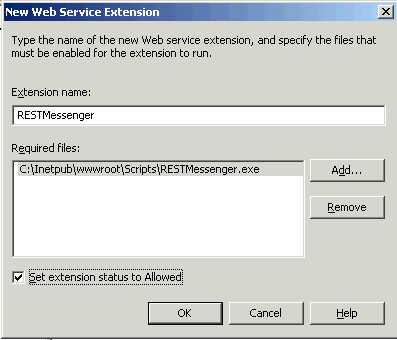
Open Windows Explorer and browse to the REST data folder. Right click the folder, select properties and then select the security tab. Add the IUSR account and tick "Write", then click Ok.