How to Install a New / Additional Rest Professional Database
Overview
This article will step you through how to install and set up a new or additional Rest Professional Database when you have an existing Rest Professional Database. You may need to engage your IT technician to assist you with this set up.
Deciding on the data location for your new database
Before installing your new database, you must decide where the data location will be for the new database.
When a Rest Professional database is initially installed, Rockend recommends that a REST folder be created inside a Rockend Shared Folder on the customers server (dedicated or peer) computer. If, in the future, the customer decides to obtain a new / additional REST database (a sales database is used in the example below) the customer can add a new folder for the new database with an identifying name into the Rockend shared folder.
To find out where the existing database resides:
- Open Rest Professional
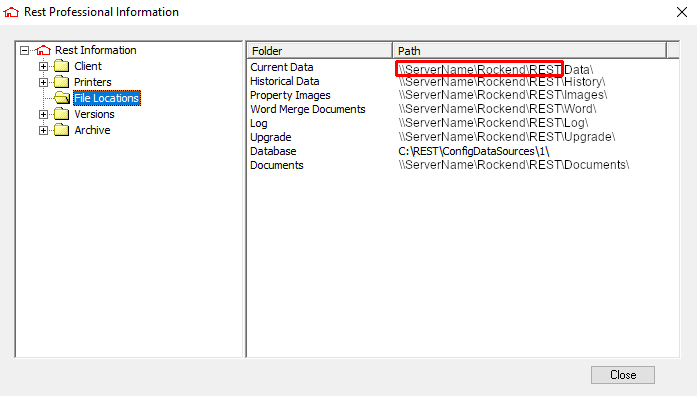
- Go to the Help Menu > About REST > REST info > File locations
- Record the path to the right hand side, where all the folders that make up your database are pointing to (Data, History, Images, Word, Log, Upgrade and Documents)
 In this example the database folders reside within the \\servername\rockend\rest folder
 - Next you will need to create a new folder, with a name relevant to the database . If creating a Sales database for example, the new folder would be created inside the Rockend Shared Folder and the new folder name could be called 'REST Sales' (Do not use full stops in the folder / path name)
Important Note: You may not have a Rockend Share set up with the Rest Folder inside to allow additional database structures to be added. If this is the case, you will need to decide if:- You would like to nestle the additional database (e.g. REST Sales) inside the current Rest share, OR
- You would like to create a new share on the server for the additional database, so when you browse through windows explorer you will see separate shares on the server for the separate databases, OR
- You would like to create a new share called Rockend and move/create all the databases to this location. If you decide on this option, please contact our Projects Team at ps.rockendprojects@mrisoftware.com to discuss this further.
Saving the Licence file
You will have received an an email from Rockend with a new licence file for the additional database.
- Open the email, save (do not open) the attached licence file to either your desktop or to the server where you created the new database folder
Installing the New Database
- Open up the existing Rest Professional database and log in with a user who has the highest security level
- Go to the Files menu > Select “New database” or “Open database” depending on your setup
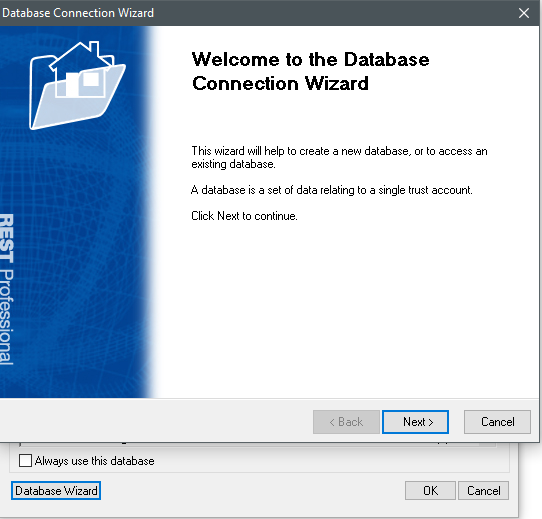
- Click on Database Wizard button
- Click next to the welcome screen

- Select the “Install new database” option and click Next
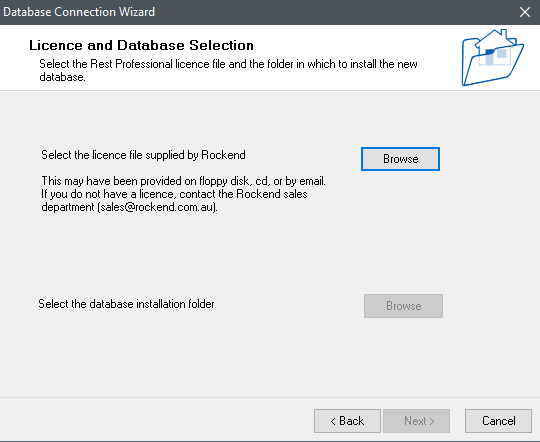
- On the next screen you will see two browse buttons. The first one located at the top is for the licence file. Click on that browse button and browse to the location where you saved the licence file
- Double click on the RESTpro.lic file (may also be appear as just RESTPro).
Note: If the file is named anything other than RESTpro.lic then you won’t be able to see it when you browse
- You will then return to the wizard where you can select the second browse button
- Browse to the new folder that you created for the additional database and click OK
- Ensure that the information next to the Details button is correct as well as the database installation folder and click Next
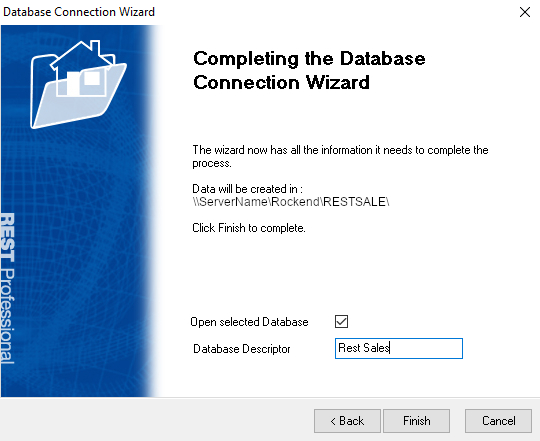
- In the Database Descriptor field enter an identifying name for the additional database. This is to ensure that when you open Rest Professional there will be no confusion as to which database you are accessing
- Click Finish

- Log into the new database
- You will be prompted to set up your printer
Your new database is now set up and ready for you to configure this with your designated Rockend consultant.

 In this example the database folders reside within the \\servername\rockend\rest folder

