Cheque Printer Alignment Settings in Strata Master
If your agencies uses pre printed cheques that are on a A4 size paper containing a remittance slip section, this article will assist you to align the printing on a cheque with the physical cheque provided by the Bank.
This article does not refer to the cheques that are provided in a cheque book, as these need to be handwritten.
Navigate to the Alignment Screen
1. Select Configure from the top toolbar.
2. Select Display and set Config Values from the drop down menu.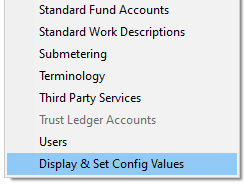
3. Select the Cheques tab and a screen similar to that below opens.


The Rules to Alignment Adjustment
What X and Y Relate To
X is the Horizontal axis (left and right)
Y is the vertical axis (up and down)
How To Move the Figures or Words
To move x right, make the number more positive or higher (eg -45 can be made -10 or +30)
To move x left, make the number more negative or lower (eg +45 can be made +10 or -30)
To move y down, make the number more positive
To move y up, make the number more negative
The Equivalent of One Line or Space
One character or one line is the equivalent in the alignment of about 180
To Change an Alignment
1. Click edit and then click into the relevant field 
2. Record the numbers in the fields before making any changes. Preferably take a screenshot of the whole screen.
3. Backspace to remove the existing number.
4. Enter a new number that you estimate to be where you want the words or numbers to print.
5. Click save.
To Test an Alignment Adjustment
Summary of Process
Print a cheque to a blank piece of paper, and when strata master asks, 'did the remittance print successfully' say no, so you have the print out but the cheque does not process and save. Then hold that printed piece of paper in front of a cheque form and note where the printing should be on the piece of paper.
Compare that to where the printing is currently appearing and use the Rules of Alignment above to move the printing to a more desirable position and re-test.
Steps to Test New Alignment Setting
1. Place a blank sheet of paper (or more) in the tray of your cheque printer and remove the cheques if possible.
2. Go to Strata Master, make your adjustments as above. Remember to record the initial settings.
3. Test your new settings by going to Quick Pay icon.
4. Enter your own Plan number and other details as below. You can change the amount and the account if you wish. Use Invoice no 1 for the first test and then increase the number as you re-test any further tweaking of the settings.
5. Click the printer button 
6. Click yes to this pop up if your see it.
7. The pop up below appears, click NO. If your click yes, the transaction will save and you will have to cancel the cheque.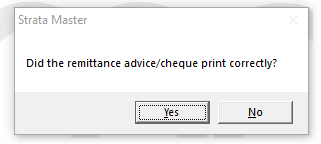
8. The cheque will print but NOT SAVE, allowing you to go to step 9.
9. Hold the piece of paper that printed in front of a cheque stationery page and hold it up to a light source eg window, computer screen. You will be able to see where those figures and words will have printed on that cheque. Mark on the printed paper where you would like to see the figures and words printed AND the settings used for this test, then go back to step 1 above.
10. When happy with the settings, you can close the Cheque alignment screen.