How to Use myMRI Portal
The MyMRI Portal is primarily a platform to log new support cases for your company and keep up to date with the progress of outstanding cases by viewing notes and updates from our Support Team.
To watch the video on how to use the myMRI Portal, click here!
How to Access Rockend Customer Lounge
From the Rockend Customer Lounge, you can use our Live Chat function, register for access to myMRI portal or login to myMRI.
- Open a webpage and go to https://www.mrisoftware.com/au/ (Please note that the portal doesn't work well with Internet Explorer, so please use another web browser if you are having any difficulties).
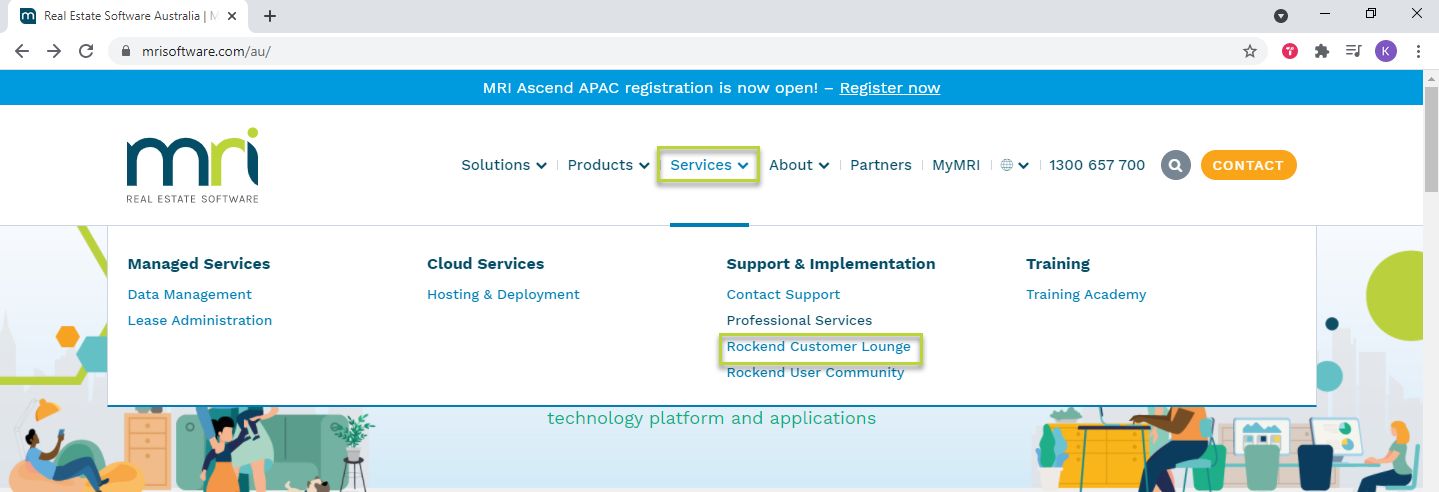
- Go to the Services Menu > Rockend Customer Lounge.
- Alternatively, you can go directly to the Rockend Customer Lounge landing page: https://www.mrisoftware.com/au/rockend-customer-lounge/ (we recommend bookmarking this page for ease of access in future).

Using Live Chat
- Click on the chat bubble on the bottom right hand side of the screen in the Customer Lounge.

- Select the Product you require support for. You will then be introduced to Rocky, our chatbot, to take a few of your details before you are then transferred to a support agent to troubleshoot your problem.

Using myMRI Portal
Registering for myMRI and Logging in
If you have never registered for myMRI Portal, click on "Click Here" and this will generate a form to complete with your details. Once you have registered you will receive a Welcome email within the next business day. Scroll down the bottom and you will see your credentials to login. Your user name is your email address.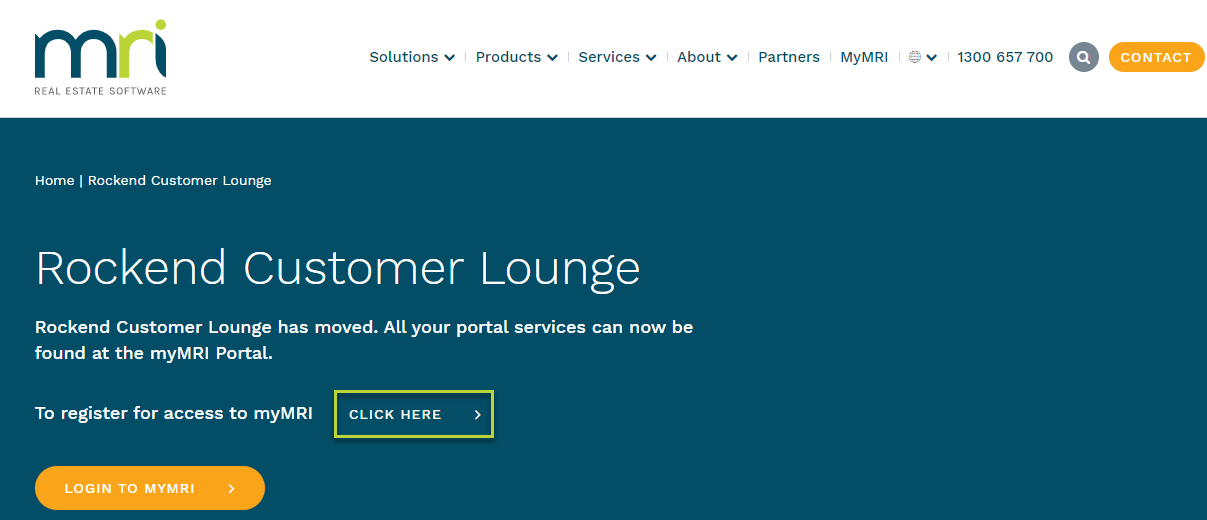
Once you have your login setup, click on "Login to myMRI" and enter your details and press Log in.
Logging Support Cases Through myMRI Portal
- Click on Create a New Case on the left hand side
- Select the Entitlement you require assistance with (ie. Rest Professional, Strata Master, File Smart) and press Next
- Select the Product (this isn't overly important, so just select any if you are unsure) and press Next
- Select the Version (if you are unsure, select the latest version) and press Next
- Select the record type, for general support this would be "Application Issue/Case" and press Next
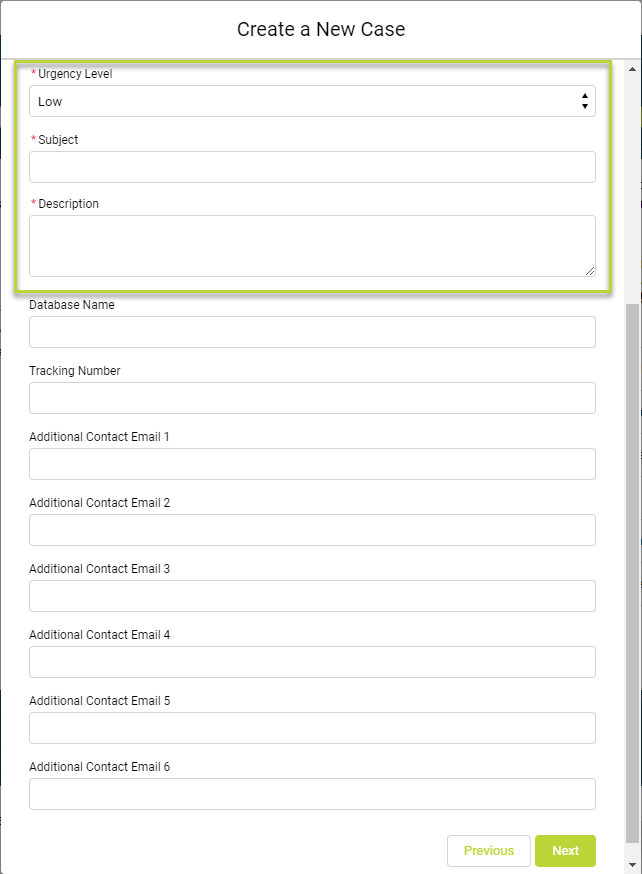
- Enter the details of the case, only the fields with the red asterisk are required, other other fields are optional should you wish to provide that information. Once complete, press Next.
- You then have the option to upload any screenshots you may have by pressing Upload Files. Once complete, press Next
- You will then receive a link to your open case if you wish to refer to it at a later date. Press Finish and your case has now been created and a Support Agent will call you to assist you with your query.
- You will also receive a confirmation email that the case has been created. If you need to forward any further correspondence to us, such as a tenant ledger, further information or a screenshot, you can simply reply to this email. You can also reply to this email and advise us to close the case if you have since resolved the case yourself.

Viewing Open & Closed Cases
myMRI Portal gives you the ability to see your open cases to check on the status and view case notes from previously closed cases. This appears at the bottom of your portal.
For further assistance, please don't hesitate to contact us on 1300 657 700 or by using the online chat function.