Salespeople as Users
In REST Professional version 11.5 Salespeople are created as Users in User Details instead of separately using the Salesperson screen. Setting up Salespeople as users provides all the features of Users to Salespeople including, setting a Salesperson as inactive while allowing historical reporting.
A conversion process must be run to convert your existing salespeople to users after upgrading to version 11.5.
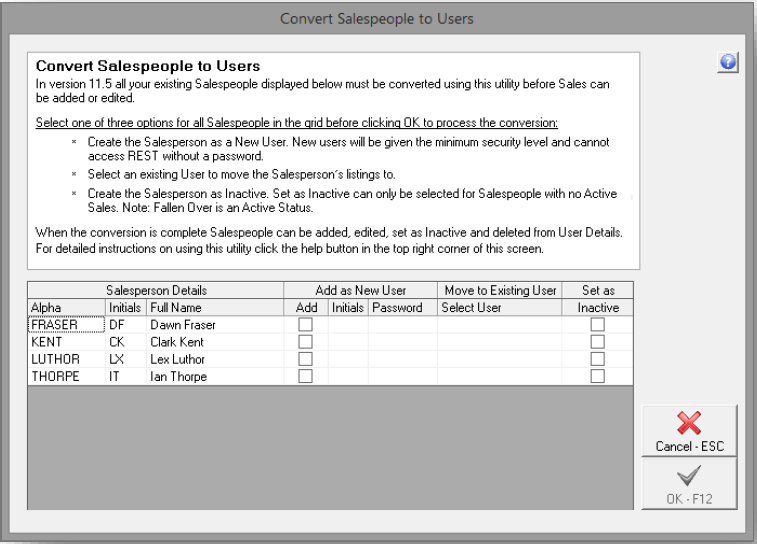
Convert Salespeople to Users
A conversion process must be run to convert all your existing Salespeople to Users before Sales can be added or edited.
One of three options must be set for all Salespeople in the grid before the conversion can be processed:
- Create the Salesperson as a New User. New users will be given the minimum security level and cannot access REST without a password.
- Select an existing User to move the salesperson's listings to.
- Create the Salesperson as Inactive. Set as Inactive can only be selected for Salespeople with no Active Sales. Note: Fallen Over is an Active Status.
To convert Salespeople to Users you must have the highest security level (Statistics/ Company Details/ Passwords & Above).
- Select Files > Sales > Sale or the Sale Details toolbar icon.

- Click Add Mode, the Convert Salespeople to Users screen displays.

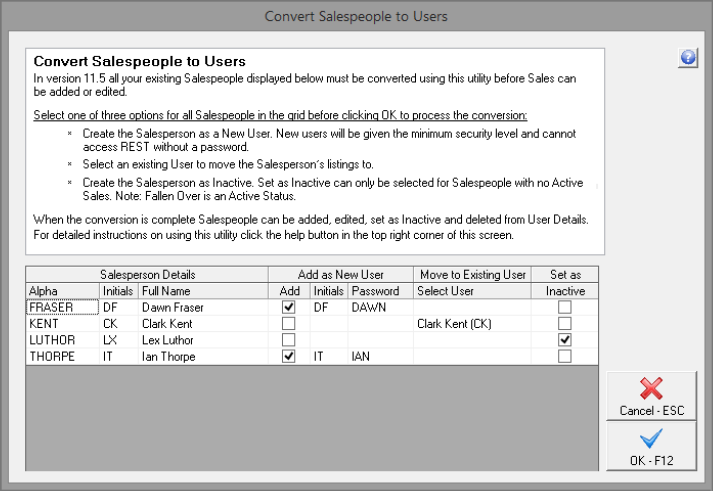
- Select one of the following options for each Salesperson displayed on the Convert Salespeople to Users screen.
Add as New User
Selecting to add a Salesperson as a new user creates a new REST User with the Salespersons details and listings. Use this option when the Salesperson is not already created as a user in REST and is a current salesperson in your agency.
To Add the Salesperson as a new user:
- Select the Add checkbox in the grid for that Salesperson.
- Confirm or enter unique Initials. If an existing Salesperson’s initials are unique they are prepopulated.
- Enter a unique Password.

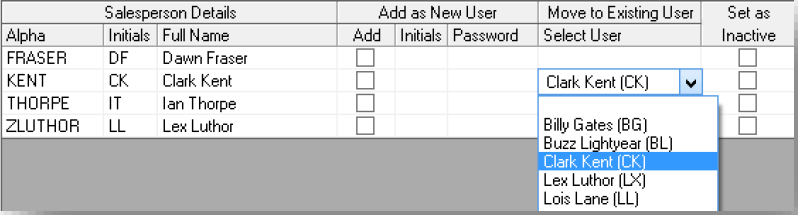
Move to Existing User
Selecting Move to Existing User marks the user selected as a Salesperson and assigns that salesperson’s listing to the selected user. Use this option when the Salesperson is already created as a user in REST for example as an Advertising Contact and is a current salesperson in your agency.
To move a Salesperson’s listings to an existing user:
- Select the Select User drop down list in the grid for that Salesperson.
- Select the Existing User from the list.
Set as Inactive
Selecting to Set as Inactive creates a new inactive user with the salesperson’s details and listings. Set as Inactive can only be selected for a Salespeople with no Active Sales. Use this option when all Sales assigned to the salesperson are completed and the salesperson is not a current salesperson in your agency.
To set as Salesperson as Inactive:
- Select the Set as Inactive checkbox in the grid for that Salesperson.

When an option has been selected for all Salespeople displayed on the Convert Salespeople to Users screen the conversion can be processed.
- Click OK, a message displays confirming the options that have been set.
- Click OK to continue and process the conversion. This may take a few minutes depending on the size of your sales database and the speed of your network. A message displays when the conversion is complete.
Tip: When Sales assigned to a salesperson have the active status Fallen Over and the salesperson is not an active salesperson in your agency, use the option Add as New User. When the conversion is complete the Salesperson can be set as inactive in User Details.
Using Salespeople
When the Convert Salespeople to Users conversion is complete Sales can be added and edited as normal. During the conversion a limited about of information is converted for each Salesperson it is recommended you check each Salesperson in user details and add any required information and adjust settings such as User Profile and Login Options.
Create a New Salesperson
From version 11.5 Salespeople are created from User Details, rather than Salesperson Details. To add or edit a User you must have the highest security level (Statistics/ Company Details/ Passwords & Above).
To add a new Salesperson:
- Select Files > User.
- Click Add Mode.
- Enter the new users, Name and Contact details.
- Click the User Profile tab.
- Enter a Password.
- Select a System and Sales Security Level from the appropriate drop down lists.
- Select the Salesperson checkbox.
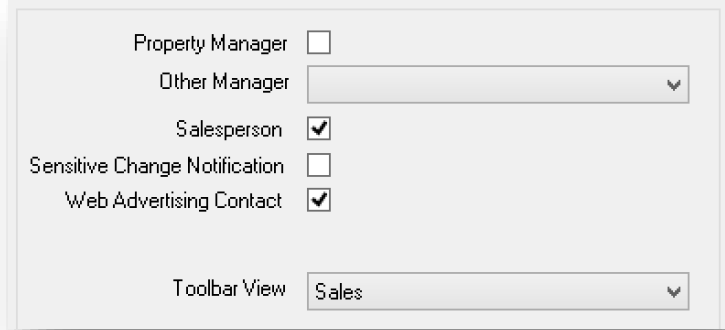
- Select the Login Options tab, select any Portfolio Check and Activity List options required for this user.
- Click OK to save the new user.
Salesperson Inactive Status
Salespeople can be set as inactive from User Details, as part of changing a user’s status you are prompted to move the users’ portfolio of Diary items, Sales, and Advertising where required.
To set a Salesperson as Inactive:
- Select Files > User.
- Click Search.
- Search for and display the appropriate User.
- Click the Active button, the User Activity Status screen displays.
- Select Inactive from the drop down list.
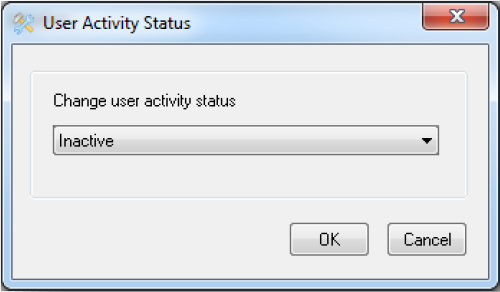
- Click OK, on User Details the Active button becomes Inactive.
- Click OK – F12 to save the User as Inactive. A message displays confirming the change of status.
- Click Yes. The Move User Portfolio screen displays.
The Move User Portfolio screen displays when the Salesperson being set as Inactive is:
- The Assigned to against Incomplete Diary Items.
- A Web Advertising Contact against Properties or Sales.
- Is a Listing or Selling Salesperson against Active Sales.
- Select a User to move each Portfolio to, from each drop down list.
- Incomplete Diary Items can be replaced by another active User.
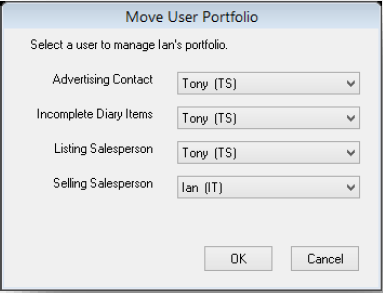
- Advertising Contact can be replaced by another active User marked as an Advertising Contact.
- Listing Salesperson on Active Sales can be left with the existing Salesperson or replaced by another active User marked as a Salesperson. Completed Sales remain with the Inactive User.
- Selling Salesperson on Active Sales can be left with the existing Salesperson or replaced by another active User marked as a Salesperson. Completed Sales remain with the Inactive User.

- Click OK, a confirmation message displays.
- Click OK to set the user as inactive and process the move portfolio.
Reporting on Inactive Salespeople
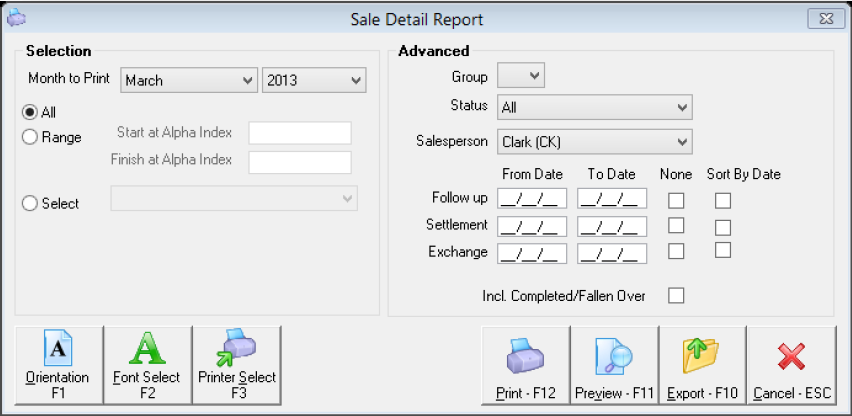
When reporting by Salesperson on Sales Reports, inactive users only display for the selected months they were active.
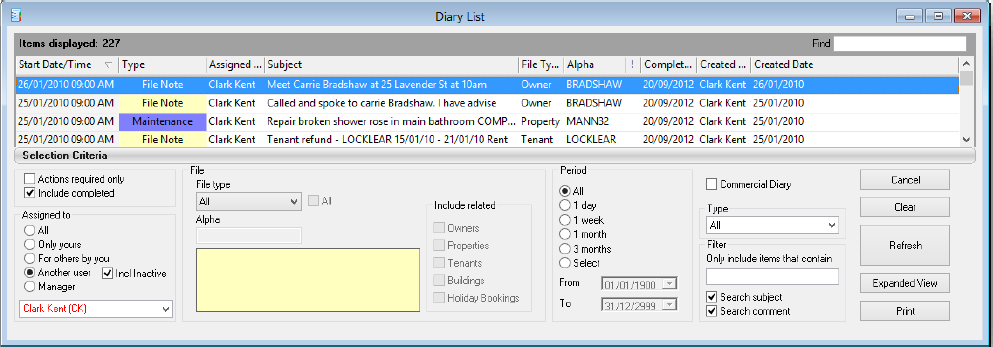
Completed Diary items assigned to inactive users can be viewed in the Diary List by selecting Assigned to Another User and Incl Inactive.
Global Changes
Global Changes has been enhanced to also change the Advertising Contact, Listing Salesperson, Selling Salesperson and Assigned to User on Incomplete Diary items.
To process a Global Change you must have the highest REST security level (Statistics/Company Details/Passwords & Above)
- Select Other > Utilities > Global Changes.
- Click OK to confirm a current back up has been processed. Backups can be processed from File > Archive > Backup.
- Click the Move Portfolio tab.
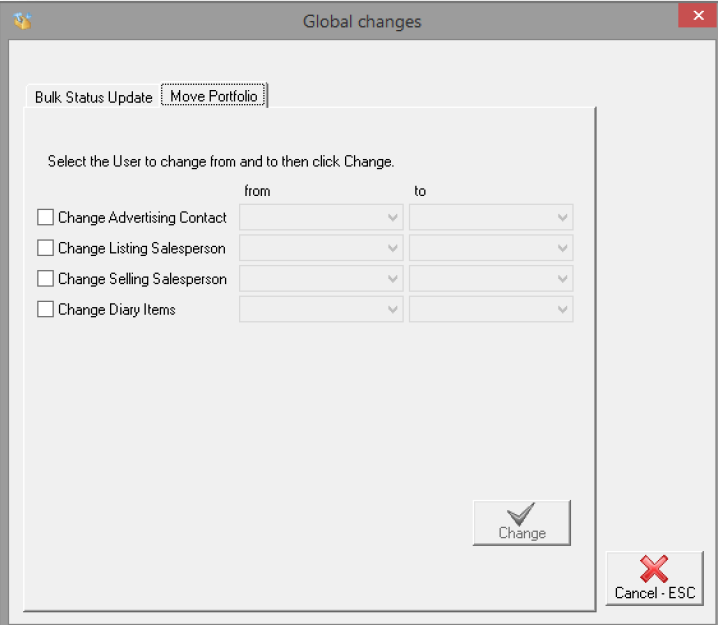
- Select the checkbox against the types you would like to globally change.
- Select a User to move the From and To.
- Click the Change button, a confirmation message displays.
- Click OK, a message displays detailing the portfolios that have been moved.