How to Add a Sale Card in REST Professional
REST Professional allows you to add sale records to your database, keeping all the relevant information relating to that sale in the one card from newly listed through to completion.
This document will guide you through the steps of adding a sale in REST from entering the Vendor, Property and Purchaser details, through to setting up the vendors and buyers solicitors and financial details.
- Go to Files > Sales > Sale or click on the
 icon and click on Add Mode F-4
 - Status – Select a sales Status from the drop down menu from Appraisal to Completed. NOTE: There are additional sales statuses in Version 11.0.04 and above.
- Click onto the Vendor tab and add the details, followed by the Buyer Details (if applicable)
 icon and click on Add Mode F-4
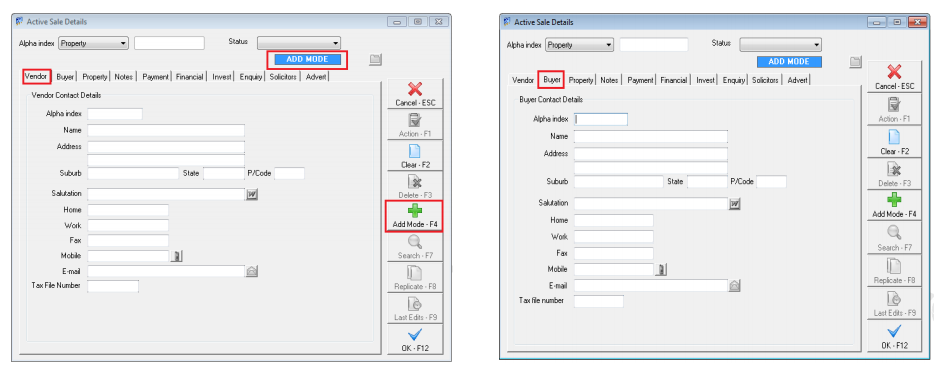
- Alpha index: Enter up to the first 10 characters of the vendors and buyers surname. This field must start with a letter, not a number and should not contain any punctuation or blank spaces.
- Name: Enter up to 40 characters. The name and address fields should be entered in the same format that you want them to be printed on the statement at settlement.
- Email address: Enter the email address for this vendor and buyer.. If you email statements to a vendor this field must contain a valid email address.
- Click on the Property tab and complete the details
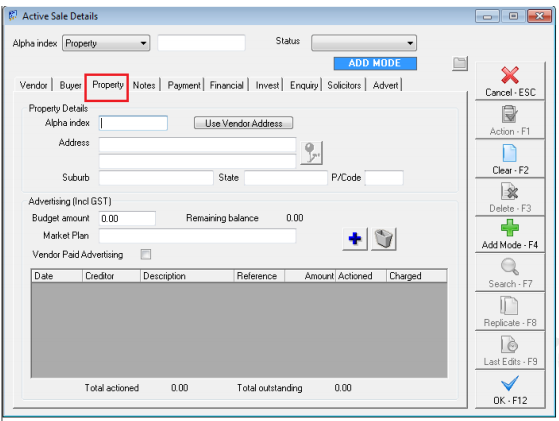
- Use vendor address: If the vendor is selling the property where they live simply click on the button ‘use Vendors Address’ note: you will have to enter the Alpha index.
- Alpha index: Enter up to the first 10 characters of the property address. This field must start with a letter, not a number, and should not contain any punctuation or embedded blank spaces. NOTE: As this field is used throughout the system to find the property you should make the alpha index as complete as possible. It is recommended that you use the first 4 characters of the street name, followed by the street number
- Advertising (incl GST): You may enter the advertising and marketing expenses that are planned for this sale, the expenses may be ticked as actioned when the item has been done. NOTE: When you tick the item to be charged REST creates an outstanding disbursement
- Budget amount: Enter the advertising budget for this sale, when you enter the advertising expenses in the grid below, REST will remind you if you go over the budget.
- Remaining balance: This reflects the budget amount minus the amount of advertising entered below
- Market plan: Enter the name of the marketing plan for this sale (if applicable)
- Vendor Paid Advertising: You should tick this option if the vendor is paying up front for the advertising, if the vendor is not pre–paying and you will account for the advertising as part of the settlement then do not select this option. NOTE: When you select this option, you may create disbursements for the advertising and the vendor invoice reports the expenses when they are charged along with any receipts and disbursements that have been posted with the ‘type’ Advertising. If you have not selected this option you may not create disbursements in REST and the vendor invoice reports the expenses when they are actioned. Once you have selected the option as pre-paid, you may not change it
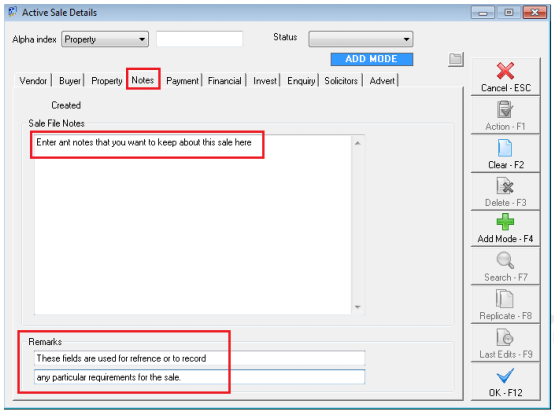
- Notes Tab - Remarks: Depending on system options selected, these remarks may be displayed every time you access the sale or post a transaction to the sale.
- Click on the Payment tab and complete all relevant details
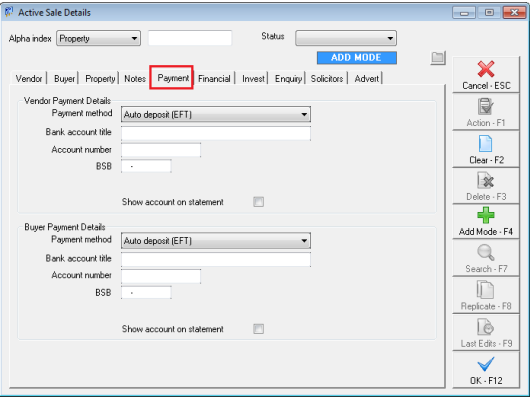
- Vendor Payment Details and Buyer Payment Details: Select from the dropdown box, the preferred payment method (cheque or auto deposit (EFT), the entry of the payment method information is optional here and may be entered or overwritten when posting the payment.
- Click on the Financial Tab and enter all relevant details
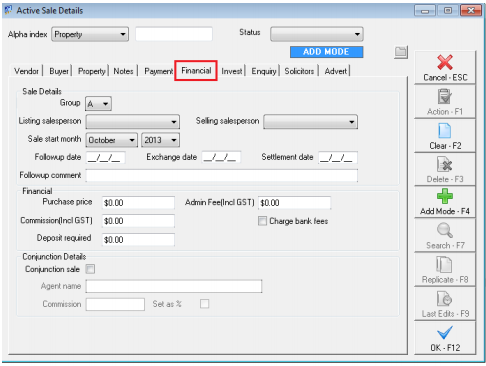
- Group: You may use the group code to group together certain sales so so that they may be reported on seperately: eg: R group for residential and C group for commercial
- Listing and Selling Salesperson: Choose the drop down menu and select a listing and selling agent
- Sale Start month: this should reflect the listed month
- Click on the Invest tab and enter the relevant details
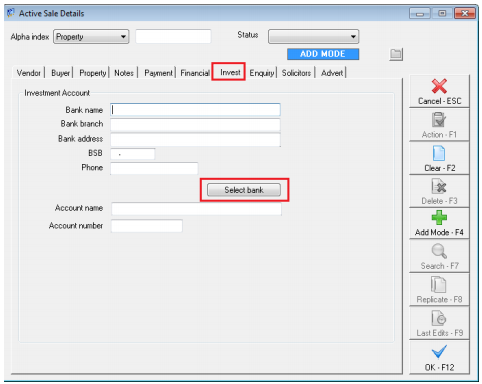
- Bank Name: If the deposit is to be invested in an interest bearing deposit account then enter the account information in here. If the bank details have already been set up through Files > Sales > Bank then clickl on Select Bank.
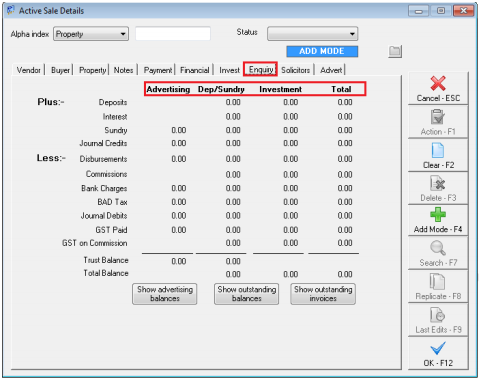
- Click on the Enquiry tab. This tab self updates when receiping and disbursing monies in REST. It reflects the balances held in the trust for advertising, deposit/sundry and investment accounts.
- Click on the Solicitors Tab and complete the relevant information
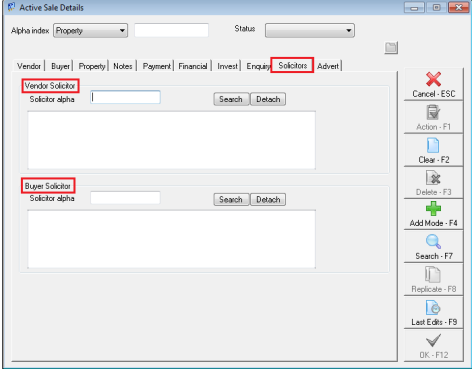
- Vendor and Buyer solicitor: enter the Vendors and the Buyers solicitors here. If the solicitors have not been entered, enter the solicitor through Files > Sales > Solicitor
- Click on the Advert tab and enter the relevant information
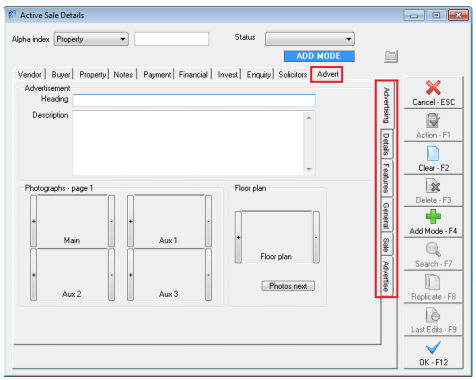
The advertising tab displays the advertising details and photos for the property. The information and photos stored here are used in the window cards and web advertising.
- Click on OK–F12 to save the sale record.