
Managing ADL Forms in REST Professional and fileSMART
Overview
This guide describes how to use REST Professional with fileSMART Archive document management integration when ADL forms is being used to create merged PDF documents.
Step by Step
This is a step by step tutorial showing how to generate an ADL forms mail merge from REST and then store it in fileSMART Archive. It also shows how to retrieve an FRM file so that it can be edited after it has been stored in fileSMART.
Note: If you need to include an ADL generated PDF in an end-of-month collation refer to the end of the document.
Step 1 – Generate a new document
The first step to managing an ADL form in fileSMART is to create one using the REST Professional Letter Writing tool. This is accessed using the Other Print Letters and Export Data menu command in REST Professional.
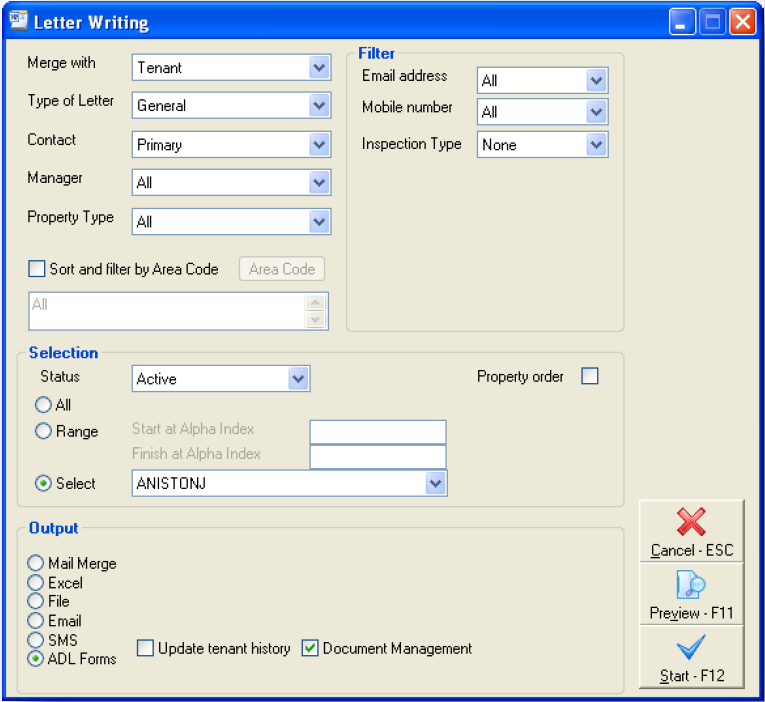
In this window we have selected a single tenant with alpha code ANISTONJ, and have set the Output mode to ADL Forms. To create the new form click the Start button. This results in ADL forms launching the form selections window as shown below.
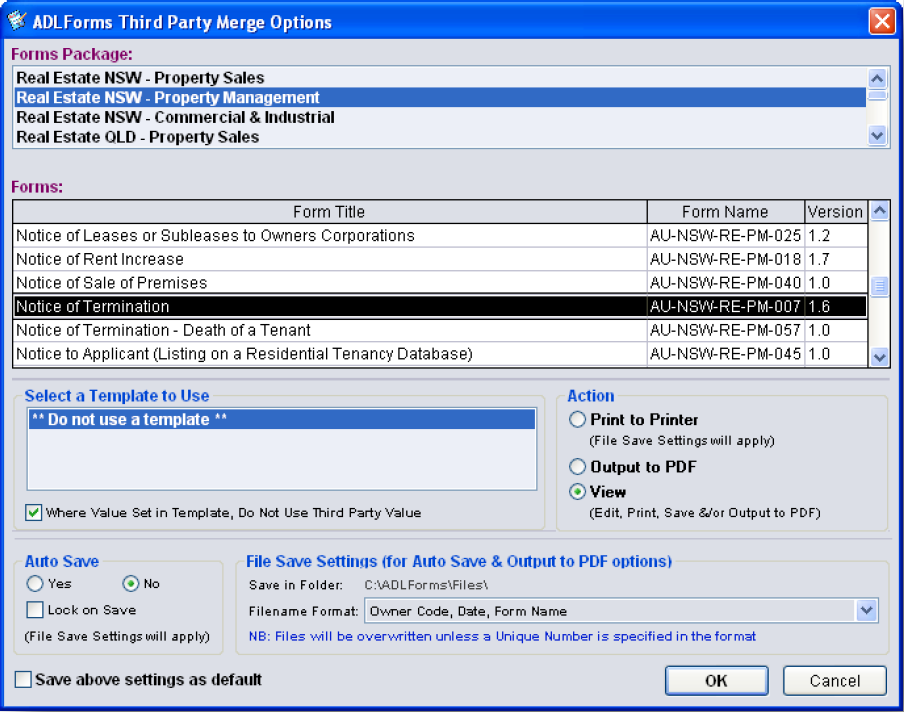
In this case we select a Notice of Termination and click OK to open it in the ADL form editor
Step 2 – Edit and Save the Form
The next step is to add any additional information to your form using the ADL forms editor as shown below.
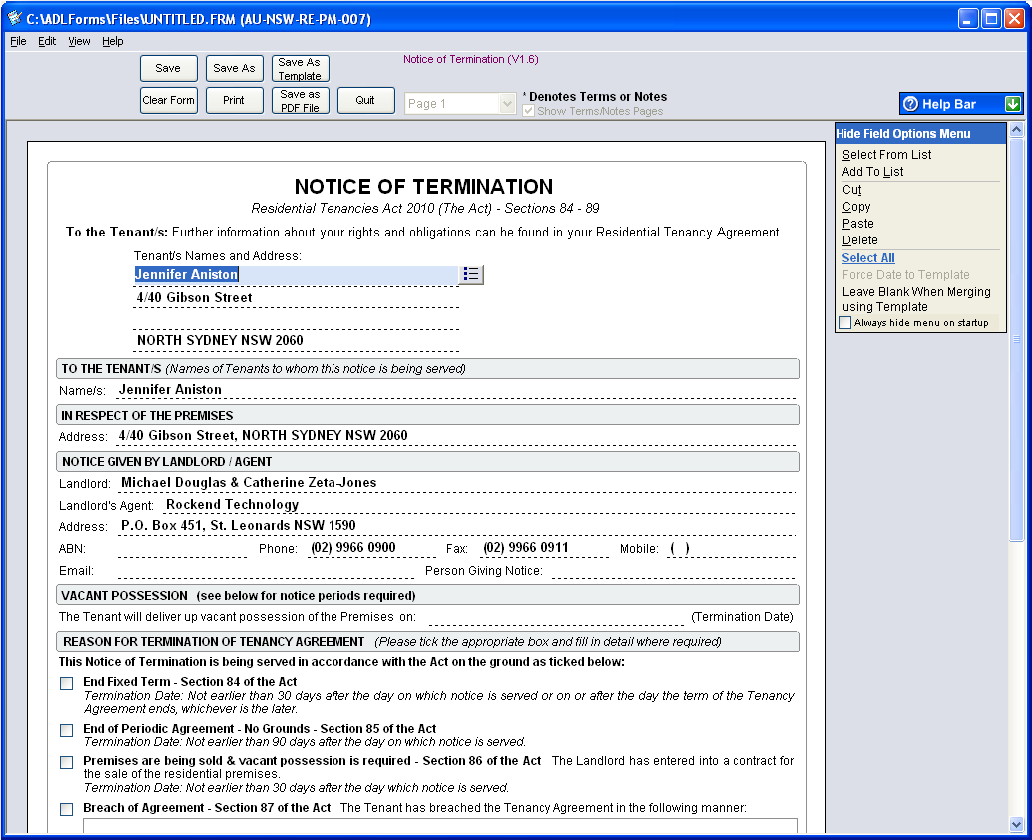
To get this document into fileSMART you need to save it to your fileSMART queue import folder. This will usually be on your local computer at C:\AS_FILES\QUEUE\<your windows login name>. You have the choice of saving the form as an FRM file if you need to make changes to it later or simply save the completed form as a PDF only.
To save the document as an FRM file use the Save As command in the ADL form editor. By saving the FRM file you can later search for the document in fileSMART Archive and open it back into the ADL form editor to make further changes. Use the Save as PDF File command to save it as a PDF file – you will not be able to change this file after it is saved.
This next screen shot shows how the save window looks in Windows XP.
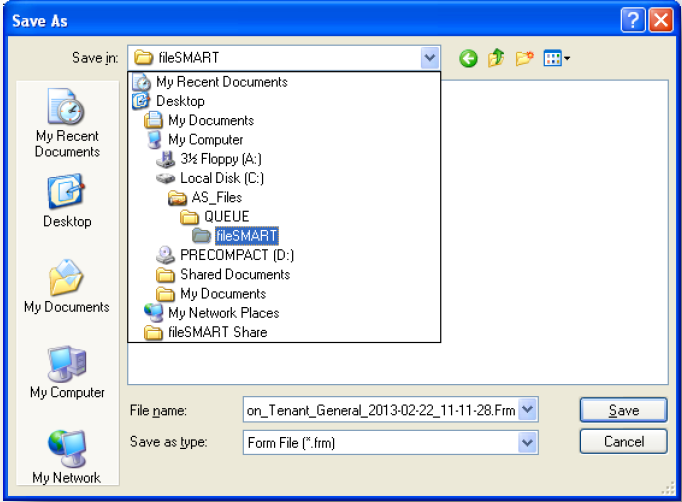
You’ll see that in this case the user had logged on to windows with the name “fileSMART”. In your case your login name will be the name of the target folder.
Step 3 – Archiving the form
The next step is to launch and log in to fileSMART Archive. You will see that the PDF and FRM files that you saved in Step 2 are now in your pending queue.
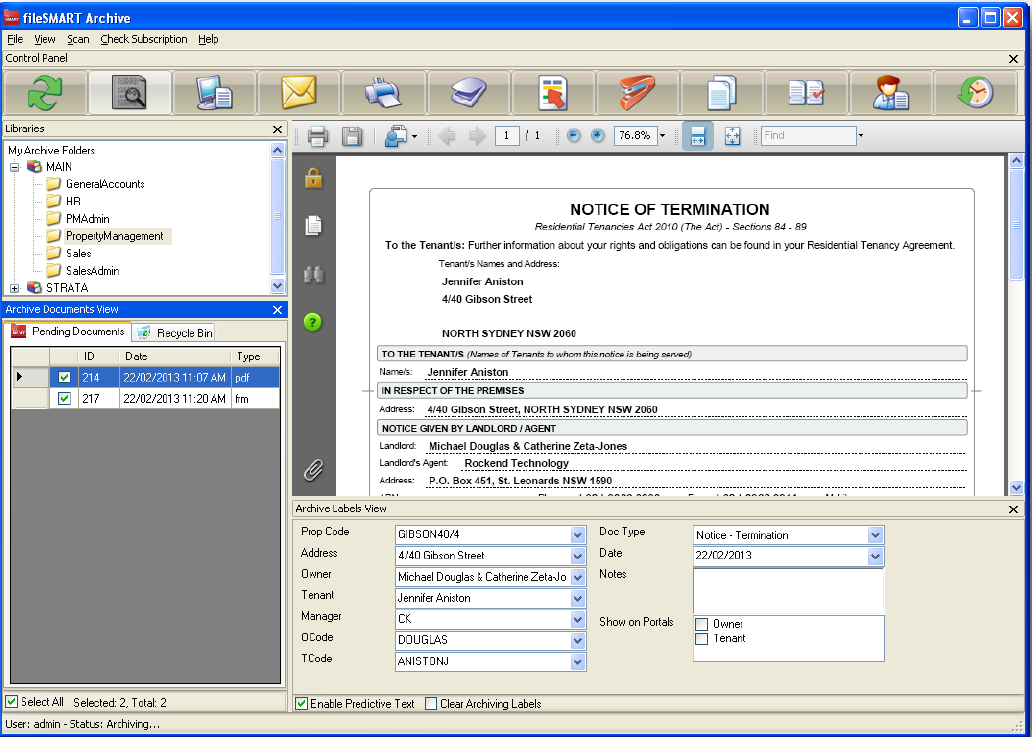
You’ll see that we have both a PDF file and an FRM file in the pending queue. Notice that they are both checked so that we can archive them in one step. By putting the focus on the PDF file we can see the details on the form to help us set the archiving meta-data.
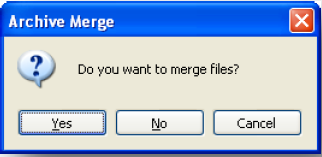
Once the form is complete press the Archive button to send the documents into fileSMART. You will be prompted with a message asking if you want to merge the documents. Make sure to press the No button here as these documents cannot be merged.
Step 4 – Searching and Opening
The final step in the process is when you want to retrieve an ADL form from fileSMART. This is really no different from searching for any other document. Simply launch fileSMART Archive, put it into search mode, enter your search criteria and hit search.
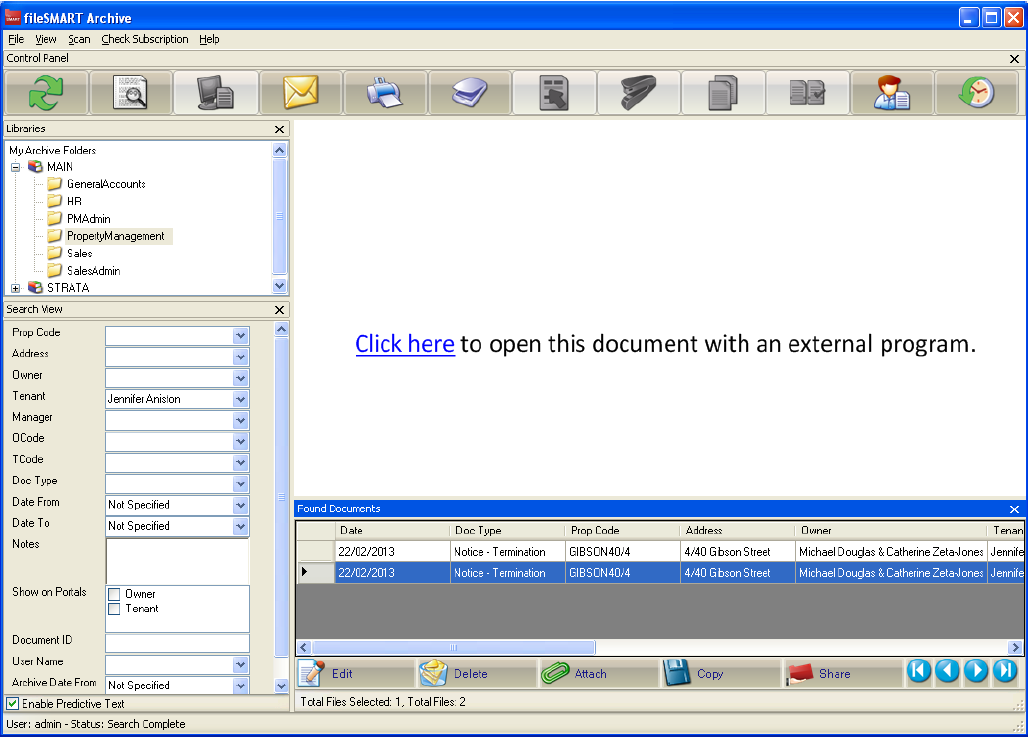
In this case we got back both the documents that we archived previously. That is, the PDF and FRM file. In this the FRM file is highlighted in the result list. Notice that the view of this document has a Click here link displayed. By clicking on this ADL forms will launch and open this document up so that it can be edited. Once you have finished with your changes simple press Save. There is no need to save it back to the pending queue.
End-of-Month Collation
ADL Forms encrypts the PDF file that it creates and prevents a number of editing operations being performed on them. This means that fileSMART PrintMail cannot collate them because we cannot open the document. This only affects PDF files that you need to include in a collation. If you don’t then fileSMART Archive can manage them perfectly well.
If you do need to collate an ADL generated form you have two options to make this possible:
- Print the ADL generated PDF with the fileSMART Archive printer driver. This will put a black and white TIFF version into your pending queue. From there you can archive the document.
- Print the ADL generated PDF with a third-party PDF printer driver. Please contact fileSMART support for how to set this up.